
Pickleball Treatment Leaders
in South Florida
From an ankle injury on the court to back pain that makes serving or reaching for a shot difficult, finding the right treatment starts with an accurate diagnosis. Our doctors develop personalized treatment plans based on each patient’s condition, activity level, and goals, with surgical and nonsurgical options available when appropriate.
With locations in Boca Raton, Deerfield Beach, and Plantation, Spine & Orthopedic Center gives South Florida pickleball players access to specialized care close to home. Our team provides specialized spine and musculoskeletal care for injuries and conditions that can interfere with your time on the court.

Our pickleball injury specialists at Spine & Orthopedic Center are proud to be Pickleball Doctors. Offering expert tips for injury prevention, performance, and more, Pickleball Doctors is a group of elite doctors dedicated to helping you stay on—and dominate—the pickleball court.
Prepare for Pickleball Play & Help Prevent Injuries
Preparing your body for the demands of pickleball can make a difference on the court. The game requires balance, coordination, flexibility, and strength as players accelerate, stop, reach, pivot, and change direction throughout a match.
A consistent warm-up can help prepare your muscles and joints for activity, while regular conditioning can build the strength and mobility needed for play. The Pickleball 10 to Win exercises below focus on key areas that can help players prepare for the physical demands of the sport.
Exercise 1
BEAR HUGS
Step 1. Stand straight or lie on your back and open up your arms, pulling your shoulders back to broaden your chest.
Step 2. Bring your arms back in, wrapping them around your chest, and pat the back of your shoulders.
Step 3. Repeat quickly 20 times.
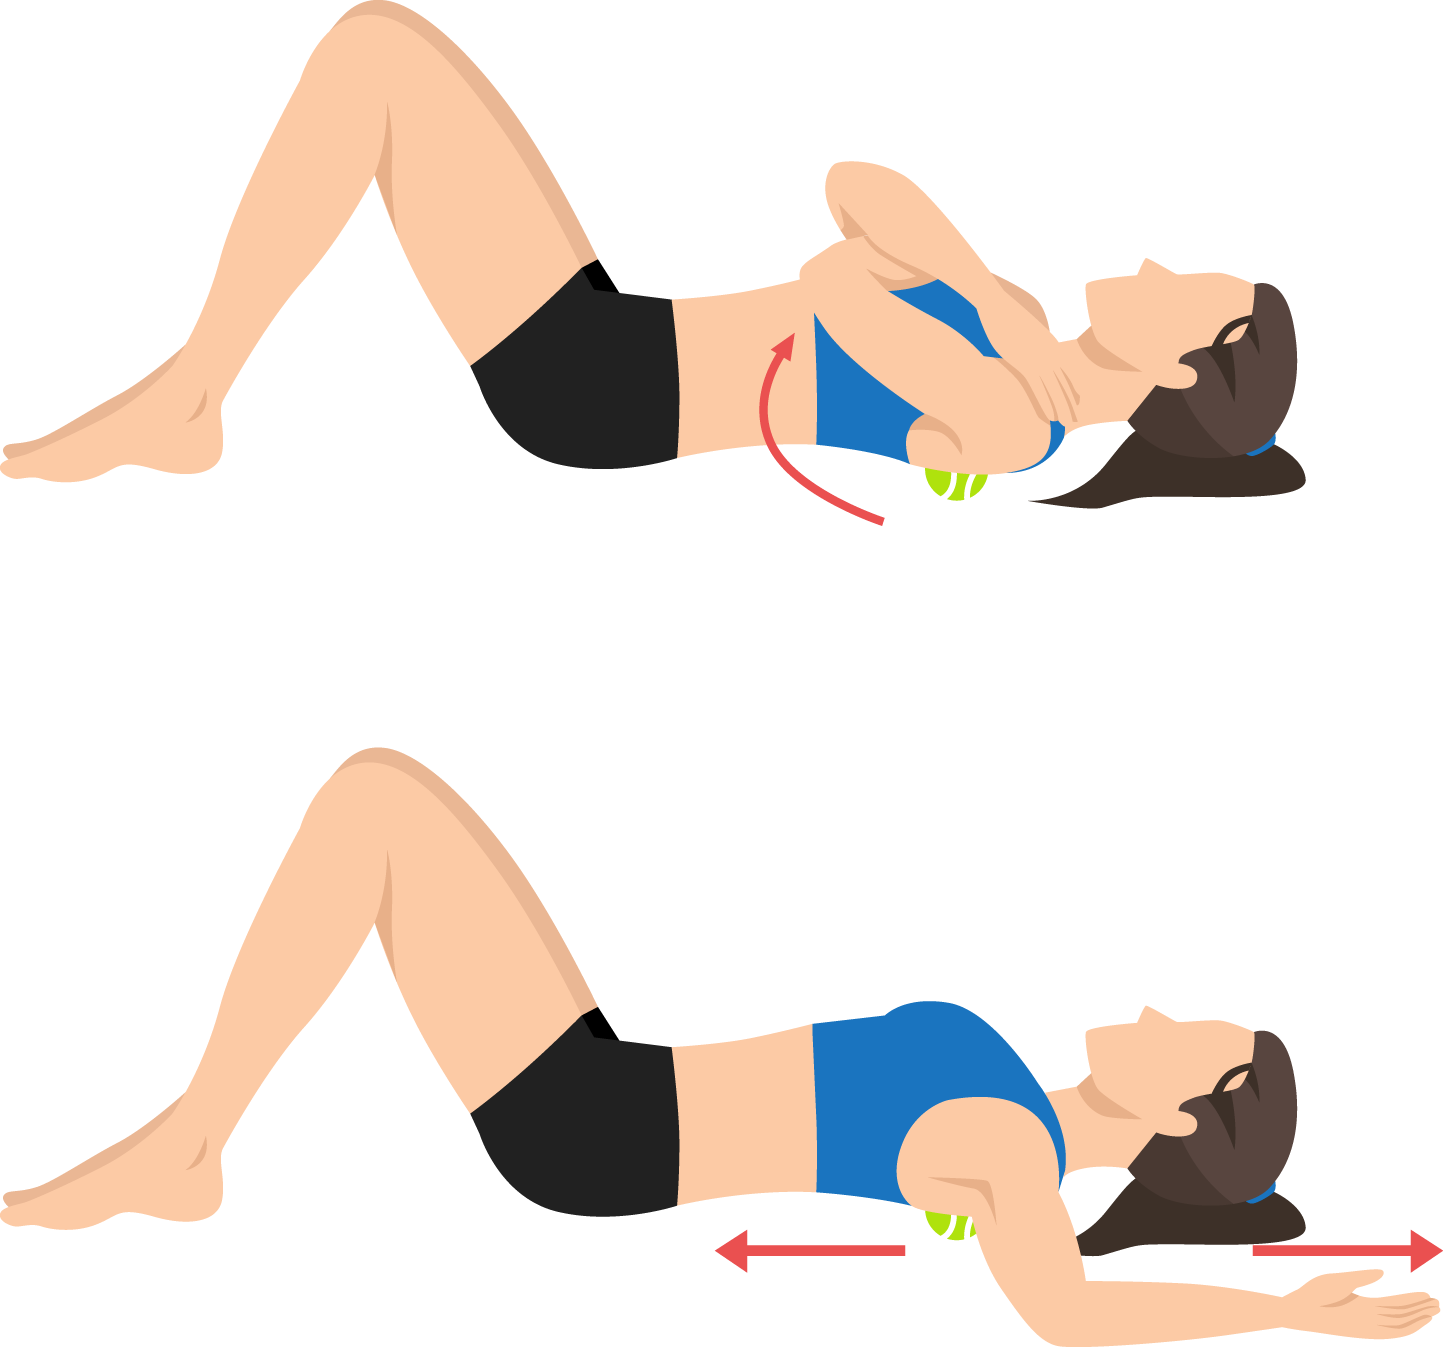
For the Win: Do some resistance bear hugs. Hold a resistance band around your back. Then, reach your arms out in front of you like you are hugging someone. Hold for 3 seconds. Repeat 10 times.
Exercise 2
POGO HOPS
Step 1. Stand with your feet shoulder-width apart.
Step 2. Bend your knees slightly, but keep your posture straight.
Step 3. Keep your feet together and jump up and down in place.
Step 4. Repeat for 30 seconds.
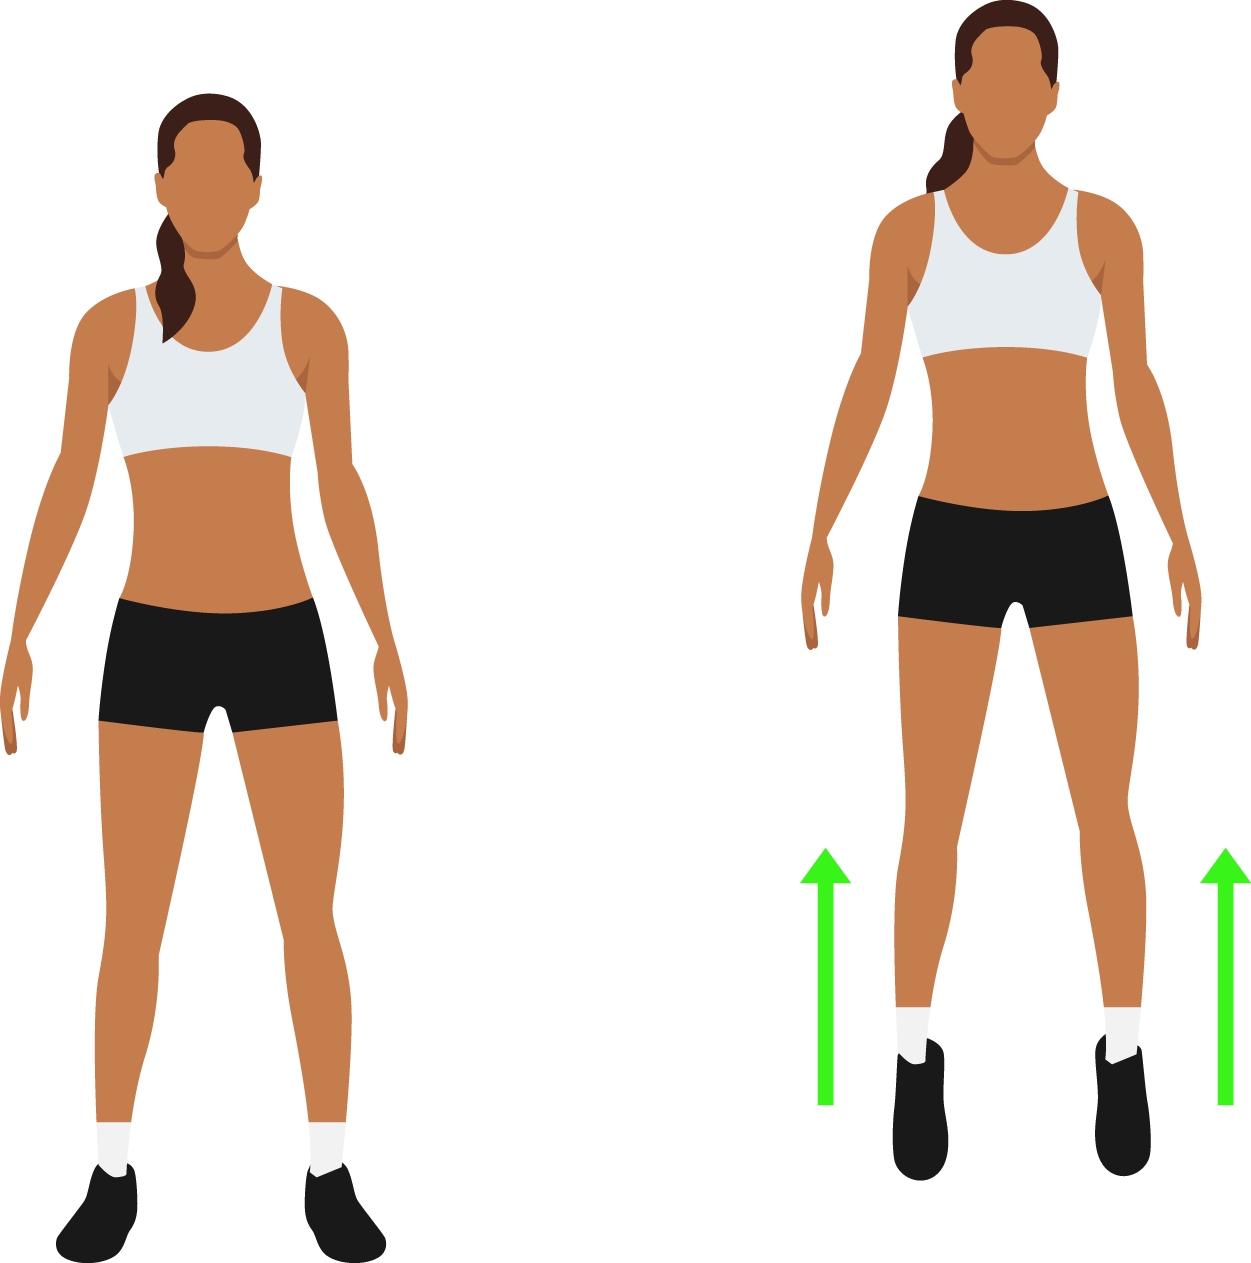
For the Win: Do some single-leg hops. Balance on one leg and hop in place for 30 seconds. Repeat while balancing on your other leg. For better agility training, use a line to hop over from left to right.
Exercise 3
SIDE-LYING LEG LIFTS
Step 1. Lie on your side with your legs straight and one leg on top of the other.
Step 2. Bend your knees slightly and move your top leg toward the sky or ceiling.
Step 3. Lift your leg slowly and lower it slowly.
Step 4. Repeat 10 times on each side.
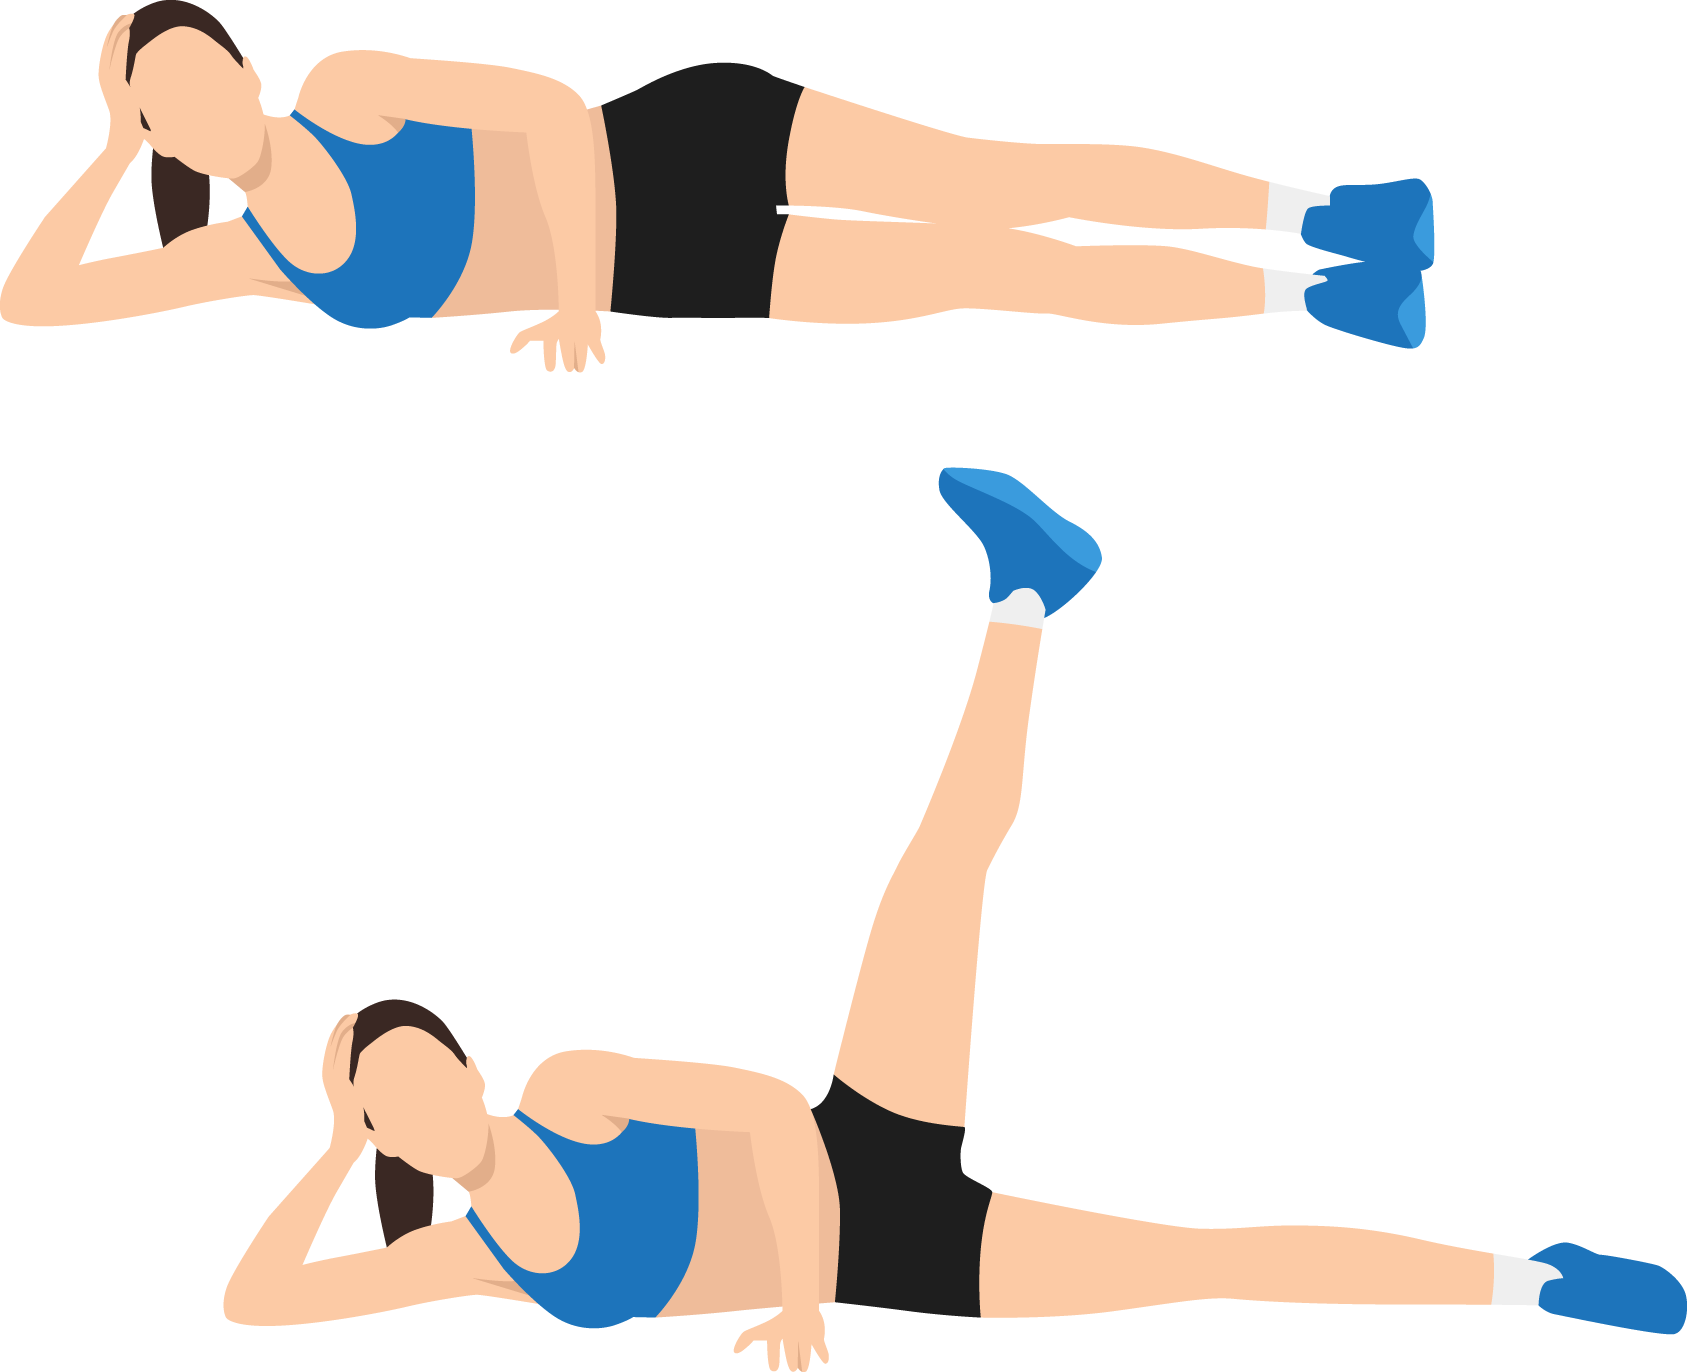
For the Win: Try resistance leg lifts! While lying on your side, place a resistance band around your legs and above your knees while you complete your leg lifts. For more of a challenge, place the band around your ankles.
Exercise 4
SINGLE-LEG BALANCE
Step 1. Stand with your feet hip-width apart.
Step 2. Lift one foot off the ground. If you need, hold your arms out to help you balance.
Step 3. Hold this position for up to a minute or as long as you can.
Step 4. Repeat on the other side.
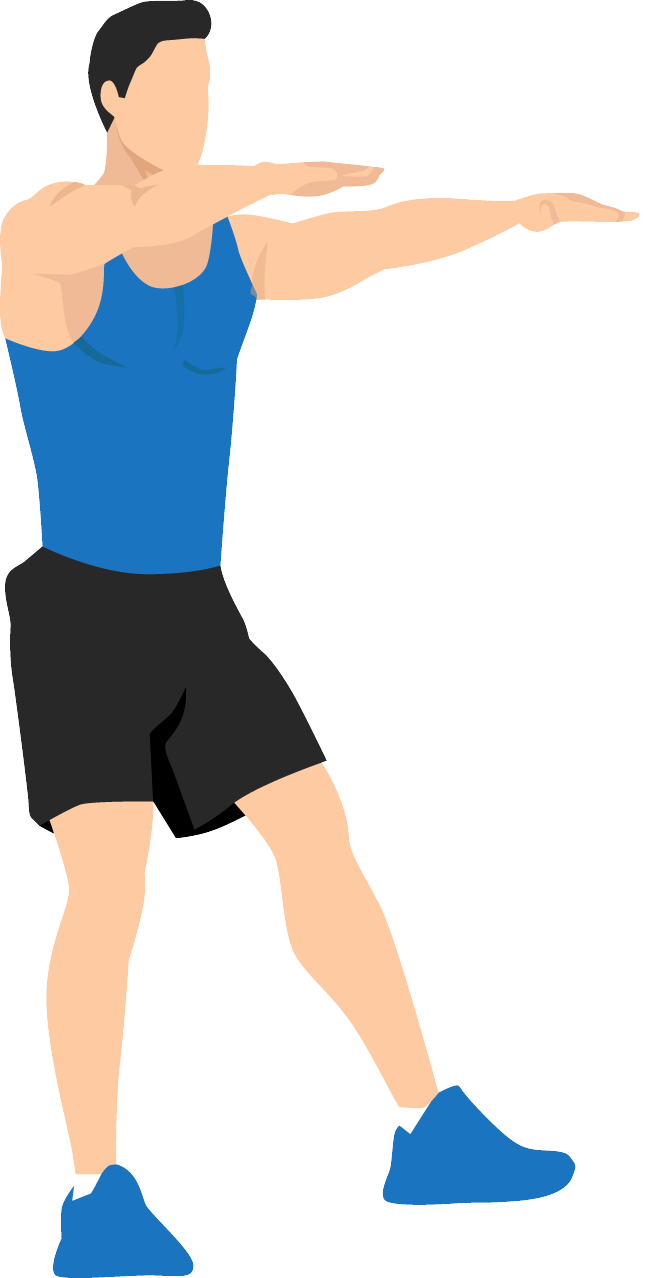
For the Win: Do single-leg extensions. Stand on one foot. Lift your other leg, extending it behind you, in front of you, and off to the side. Center your leg before each extension. Repeat 15 times on each side.
Exercise 5
STANDING QUAD STRETCH
Step 1. Stand on one foot and pull the other behind you, holding the ankle.
Step 2. If you need, hold onto something for balance.
Step 3. Pull your heel toward your buttocks, and hold for 30 seconds.
Step 4. Repeat for 3 sets on each side.
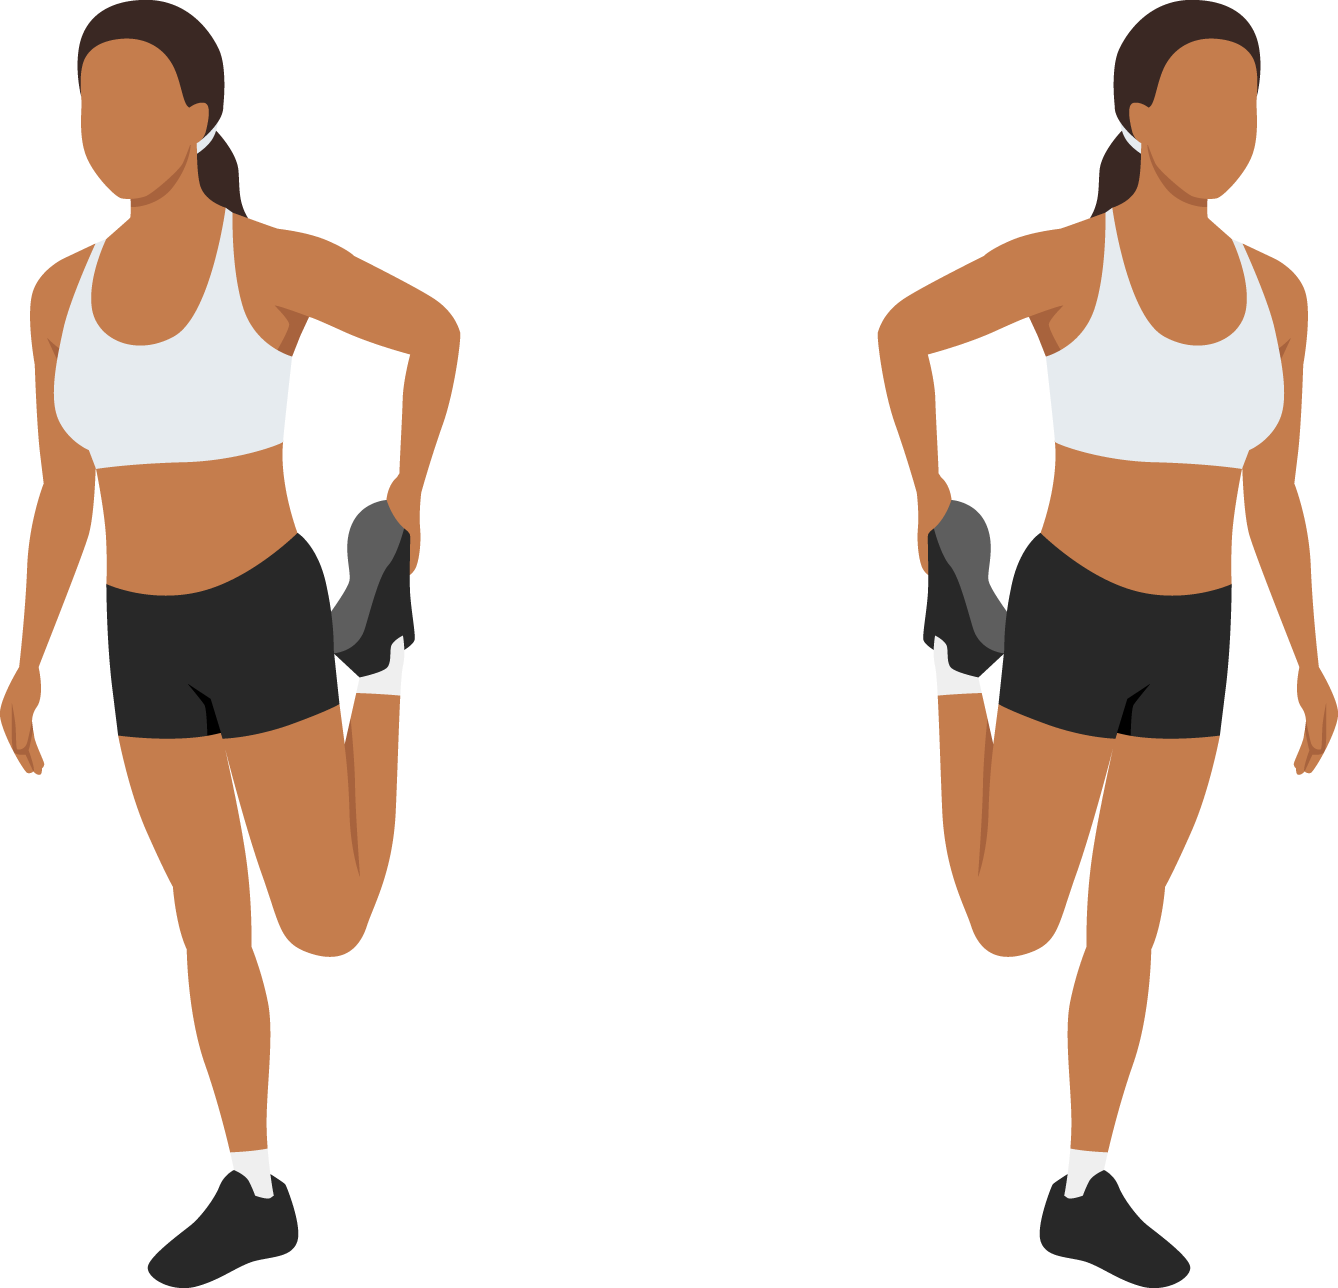
For the Win: Do kneeling quad stretches. Kneel on one knee with the opposite foot planted flat in front of you. Push your hips forward and hold for 30 seconds. Repeat for 3 sets on each side.
Exercise 6
ROWS
Step 1. Put a resistance band around a stable surface, like a tree or fence, holding the band in each hand.
Step 2. Stand facing the band with your feet hip-width apart.
Step 3. Pull the band toward you, squeezing your shoulder blades.
Step 4. Return to your starting position.
Step 5. Repeat 15 times.
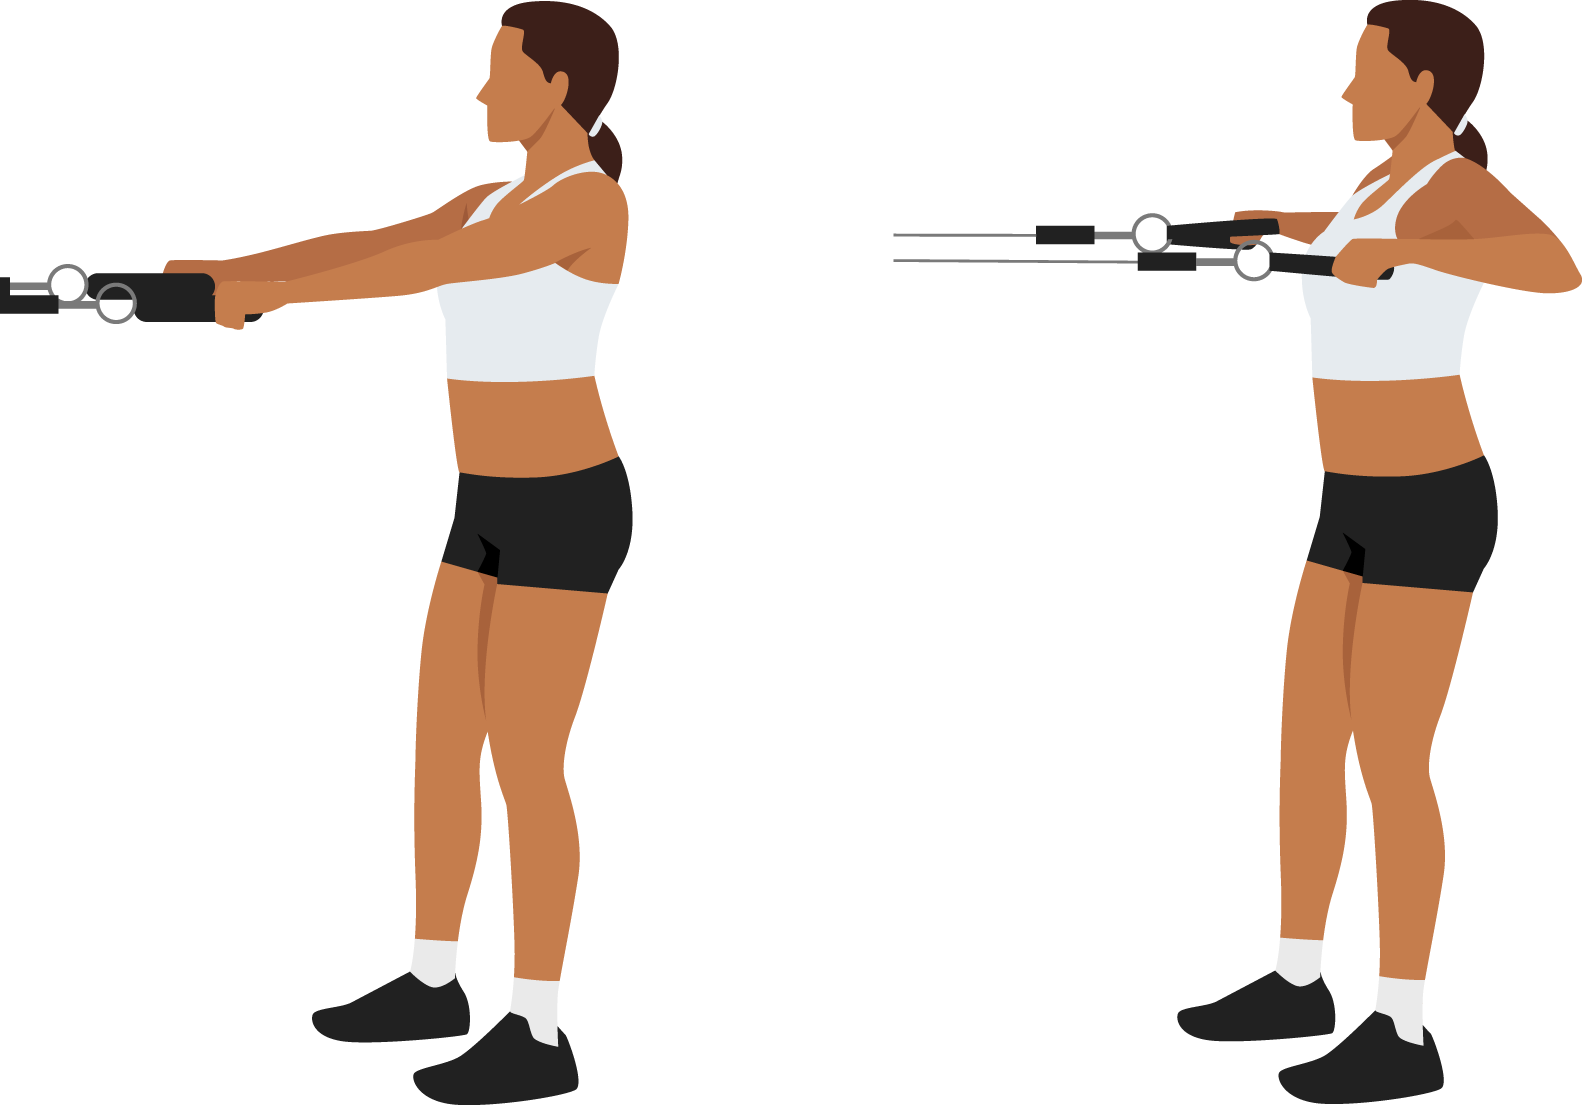
For the Win: Do some bodyweight rows. Instead of resistance bands, use your body weight. Find a stable horizontal surface, such as a table or bar, and lie underneath it, grasping the surface firmly with both hands. Pull yourself up then lower yourself back down. Repeat 15 times.
Exercise 7
PLANKS
Step 1. Put your hands and knees on the ground, then extend your legs behind you.
Step 2. Support your weight on your forearms and toes.
Step 3. Keep your body straight from your head to your heels.
Step 4. Hold this position as long as you can.
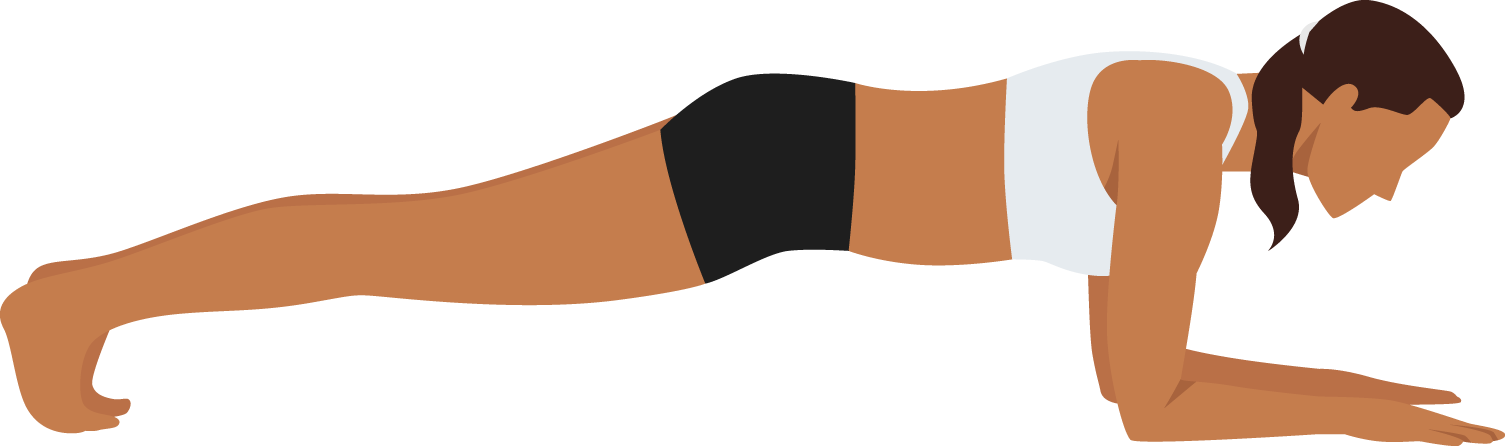
For the Win: Try side planks with resistance in your arms. Support your weight on one foot and forearm. Hold a resistance band in both hands, and extend your free arm toward the sky or ceiling. Repeat 10 times on each side.
Exercise 8
HEEL RAISES
Step 1. Stand with your feet shoulder-width apart.
Step 2. Slowly lift your heels off the ground, rising up onto the balls of your feet.
Step 3. Pause as you get to your tip-toe position, then lower your heels slowly back down to the ground.
Step 4. Repeat 20 times.
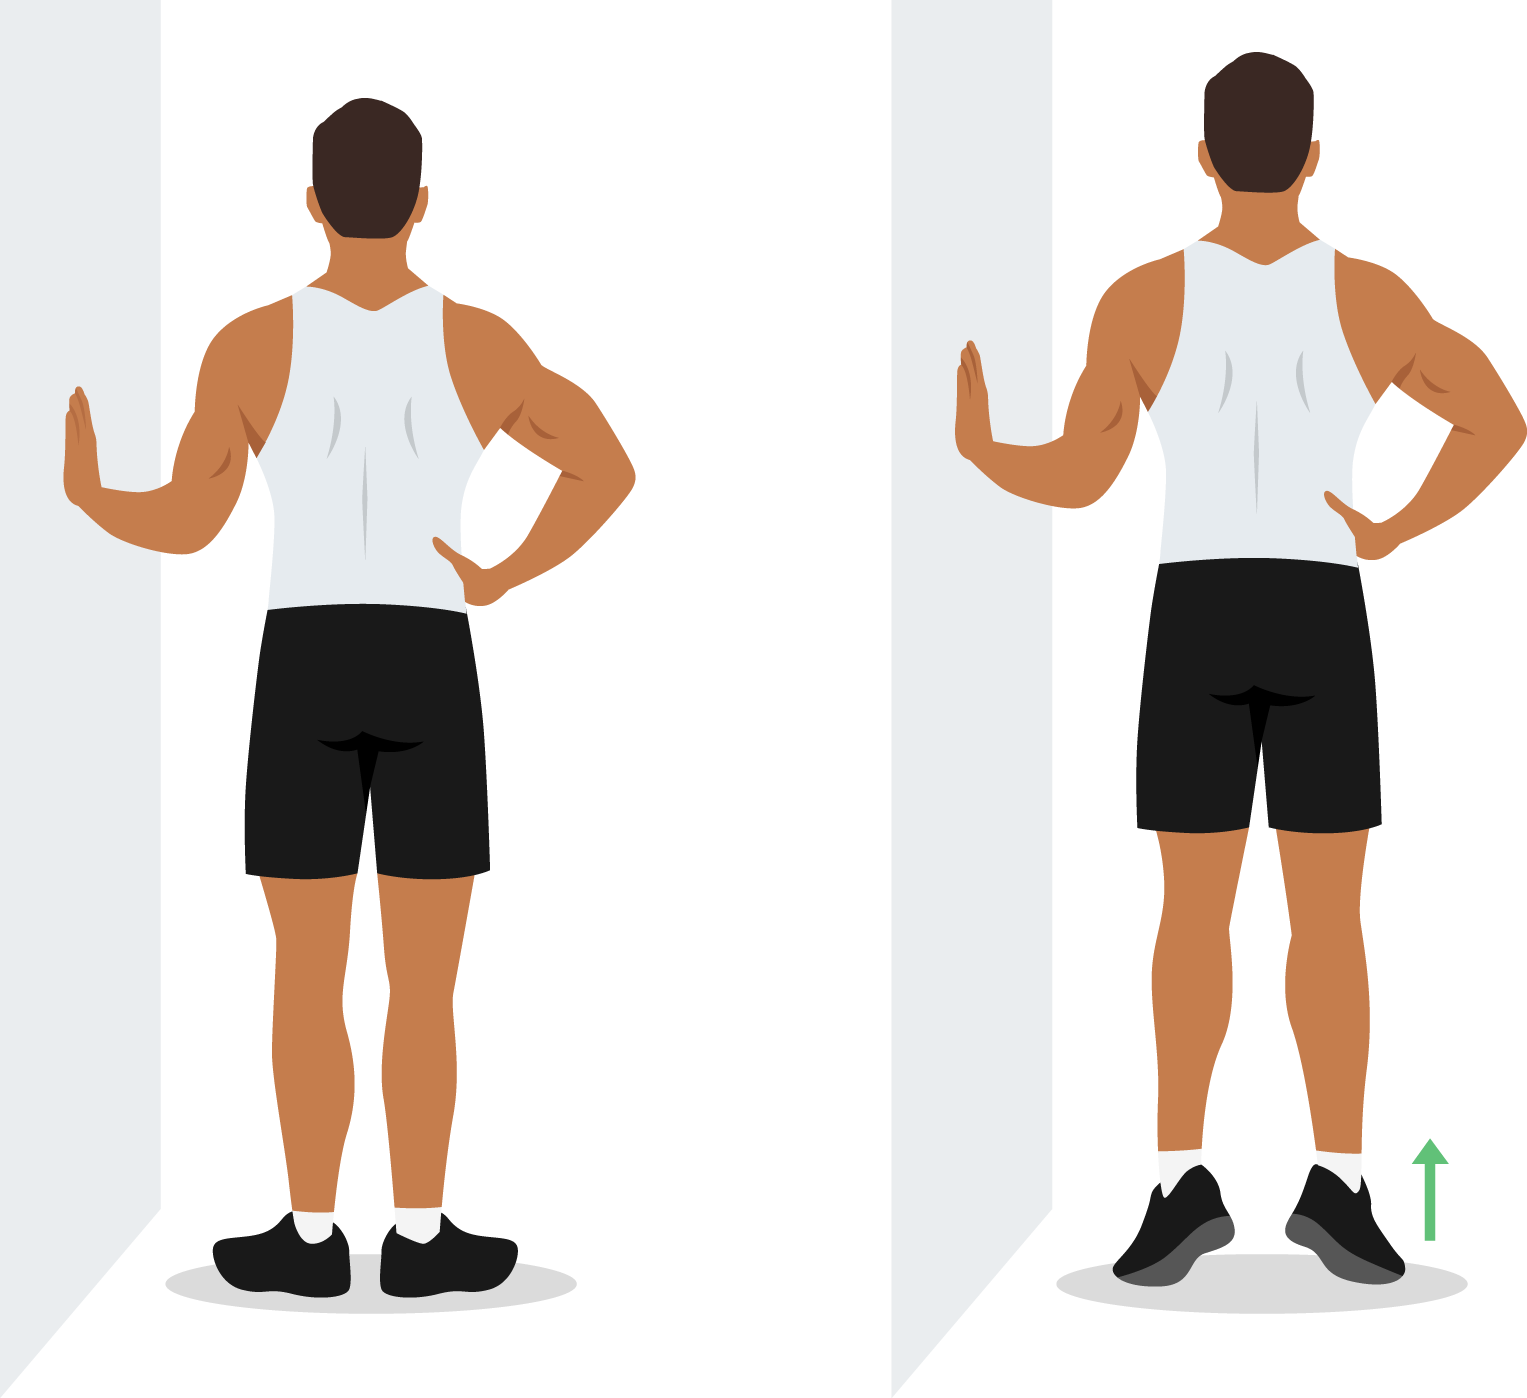
For the Win: Try single-leg heel raises. Instead of using both feet, lift one foot off the ground while putting your weight on the other foot and lifting that heel up. Repeat 20 times on each side.
Exercise 9
SQUATS
Step 1. Stand with your feet shoulder-width apart.
Step 2. Lower your hips down and back as if you are sitting down in a chair.
Step 3. Keep your weight on your heels.
Step 4. Return to a standing position.
Step 5. Repeat 10 times.
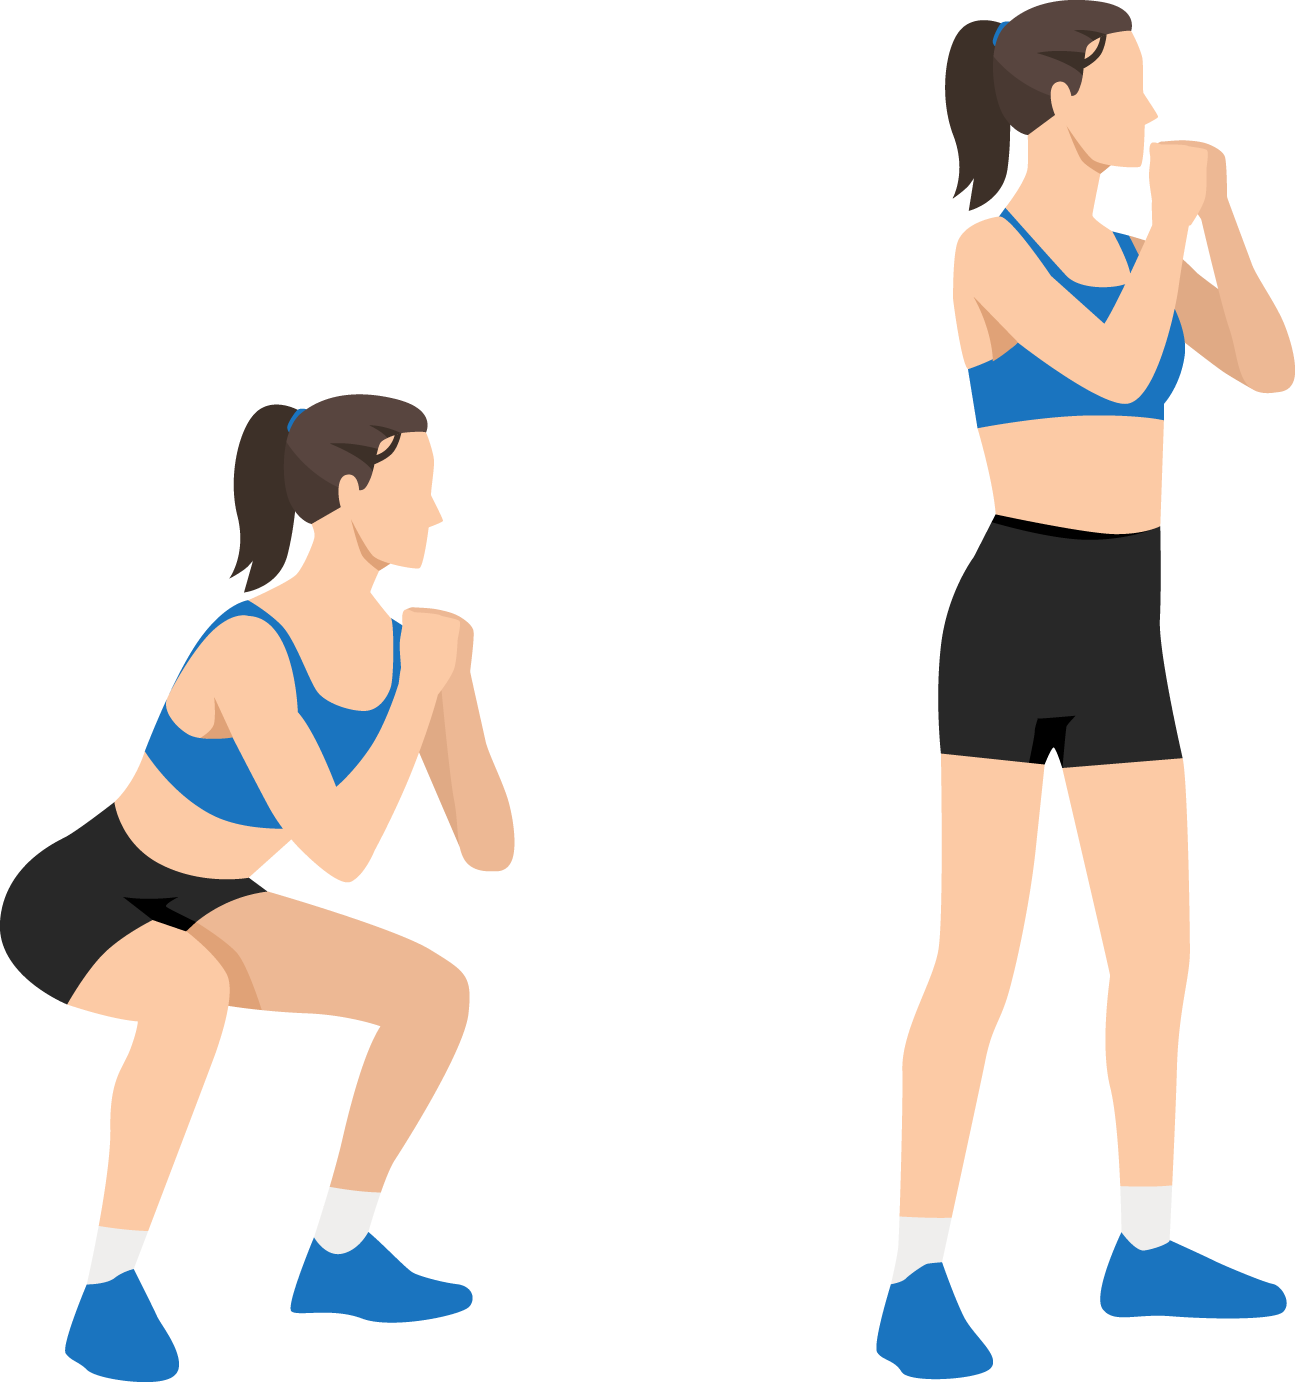
For the Win: Try single-leg squats. Instead of two feet down as you squat, lift one foot off the ground and extend it in front of you as you lower your hips and return to a standing position. Repeat 10 times on each side.
Exercise 10
LUNGES
Step 1. Stand with feet hip-width apart.
Step 2. Take a big step forward with one foot.
Step 3. Lower your hips down until your front knee is bent at a 90-degree angle.
Step 4. Keep your weight on your front heel.
Step 5. Push off your front foot to return to a standing position.
Step 6. Repeat 10 times on each side.
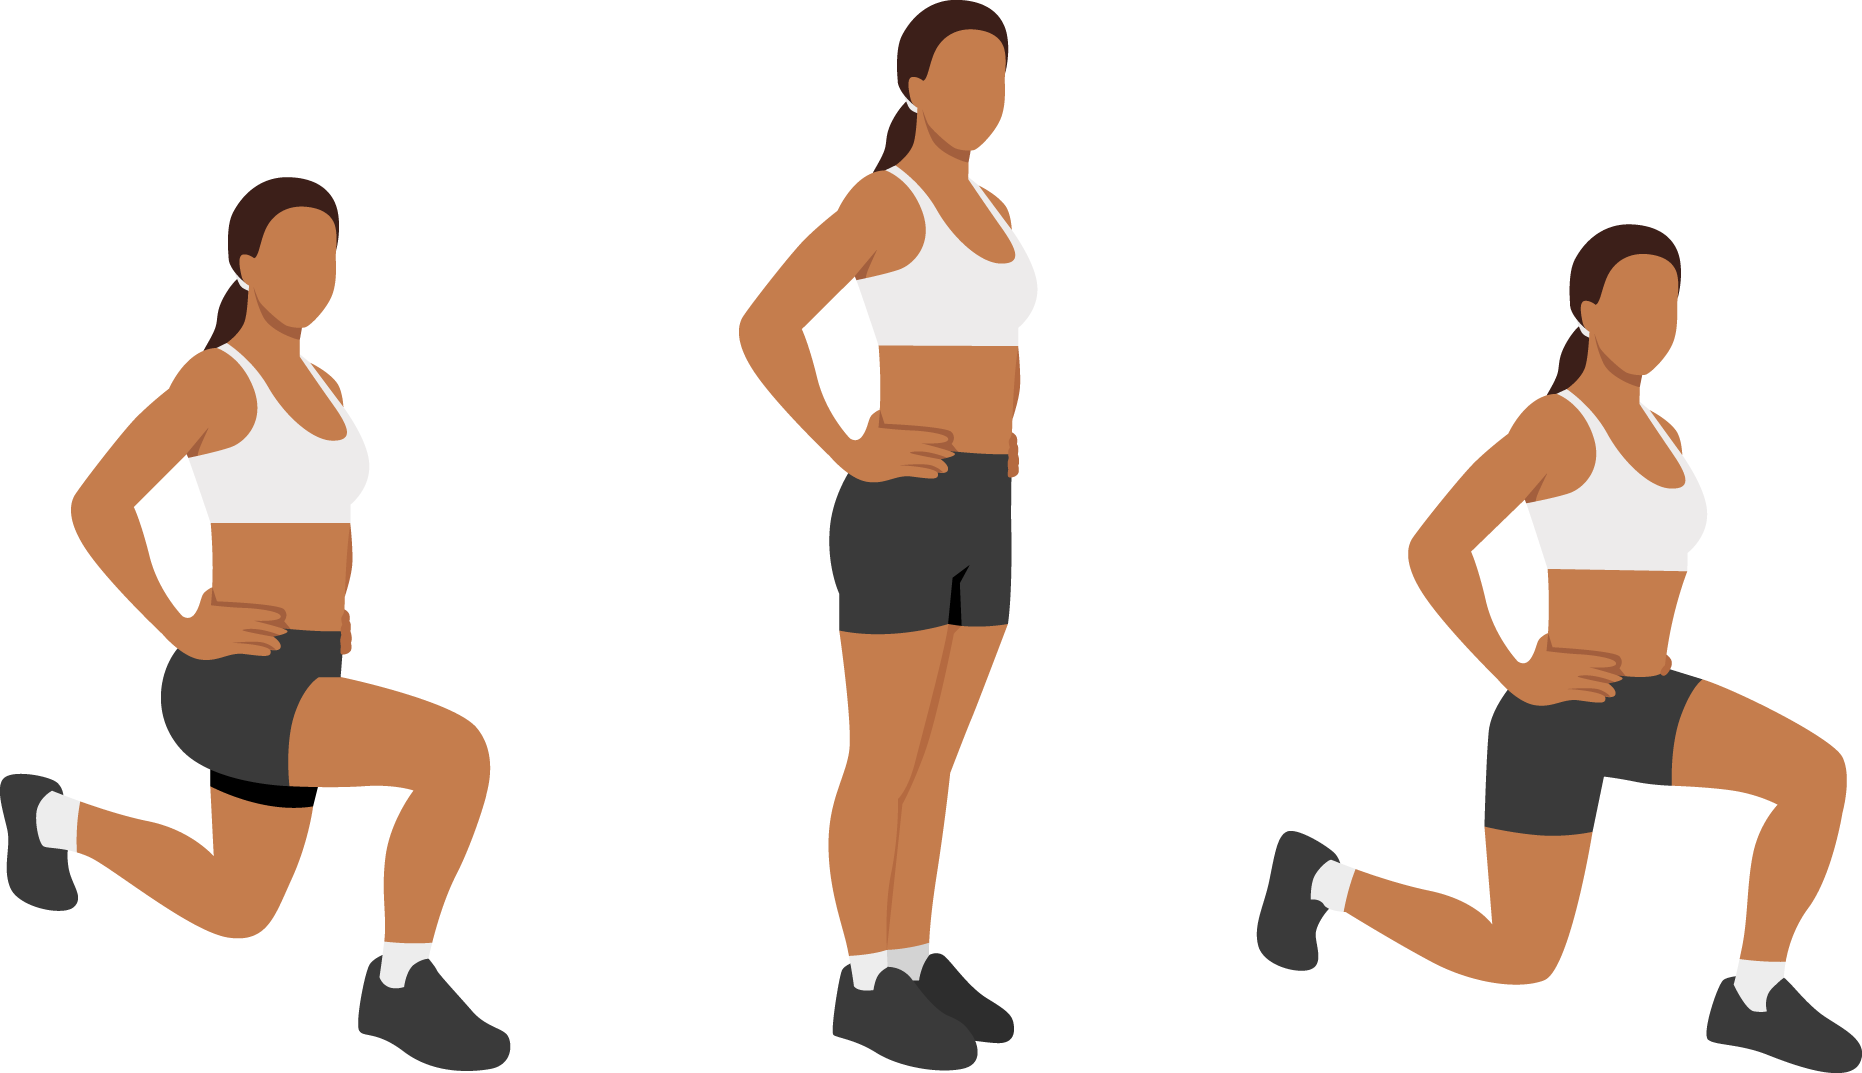
For the Win: Do backward and side lunges. For backward lunges, take a big step backward, lower, and push off your back foot to return to standing. For side lunges, take a step out to the side, lower yourself on that side, and push back up from that foot to return to standing.
When to See a Doctor for a Pickleball Injury
Not every ache after a pickleball match requires medical treatment, but persistent or severe symptoms should not be ignored. Consider seeing a doctor if an injury or pain begins to limit your ability to play, walk, perform daily activities, or comfortably move the affected area.
Signs that it may be time to seek care include:
- A popping sensation followed by sudden pain
- Difficulty standing or putting weight on the foot, ankle, knee, or leg
- Pain that continues despite rest and activity modification
- Persistent back or neck pain during or after play
- Pain when bending, twisting, serving, or reaching
- Swelling, tenderness, or limited movement
- Numbness, tingling, or pain that travels into an arm or leg
Pickleball injuries can affect many areas of the body. Conditions treated at Spine & Orthopedic Center include:
- Achilles tendon injuries
- Ankle fractures and ligament injuries
- Back and neck injuries
- Foot and ankle injuries
- Herniated discs
- Joint and muscle pain
- Pinched nerves
- Sprains and strains
- Spine-related sports injuries
Spine & Orthopedic Center offers nonsurgical treatment options such as activity modification, bracing, medications, image-guided injections, and physical therapy and rehabilitation, as well as surgical care when appropriate.

Who to See
Ashish K. Sahai, M.D.
Founder of Spine & Orthopedic Center, Dr. Ashish Sahai, an accomplished and renowned spine surgeon, is a board-certified orthopedic surgeon who specializes in spinal surgery and practices in both Broward and Palm Beach county. In recent years, Dr. Sahai has gained recognition for his innovative contributions to spine surgery techniques, which have garnered attention across the medical field.

Who to See
David A. Vecchione, M.D.
Dr. David Vecchione is a highly skilled orthopedic surgeon specializing in minimally invasive and reconstructive spine surgery practicing in our offices in Boca Raton, Coral Springs, Deerfield Beach, and Plantation.
Dr.Vecchione’s began his medical path at New York University School of Medicine, where he obtained his medical degree, followed by his orthopedic residency at Jackson Memorial Hospital. He then went on to complete his spine surgery fellowship at William Beaumont Health System.

Who to See
Alan A. MacGill, D.P.M.
A native of Florida, Dr. MacGill grew up in Tampa and attended the University of Florida in Gainesville. He majored in premedical studies and minored in sociology, earning his Bachelor of Science degree with honors. He then attended the Dr. William M. Scholl College of Podiatric Medicine at Rosalind Franklin University in North Chicago, Illinois. He graduated in the top 10th percentile of his class and matched with his first choice for residency at AdventHealth in Orlando, Florida, a top-tier foot and ankle surgical residency in Florida by case volume and diversity.

Who to See
Kristy A. Fisher, M.D.
Dr. Kristy Fisher is a highly skilled pain management doctor dedicated to providing leading-edge and compassionate care to patients suffering from chronic and acute pain conditions. Dual-board-certified in interventional pain medicine and psychiatry, Dr. Fisher brings a comprehensive, patient-centered approach to treating complex pain issues.

Who to See
Marisa A. Seegobin, M.D.
Dr. Marisa Seegobin is a fellowship-trained sports medicine surgeon who is passionate about helping patients stay active and return to the activities that are most meaningful to them. From competitive athletes and weekend warriors to patients simply looking to move comfortably through everyday life, Dr. Seegobin takes the time to understand each patient’s individual goals and develop a treatment plan around their needs.